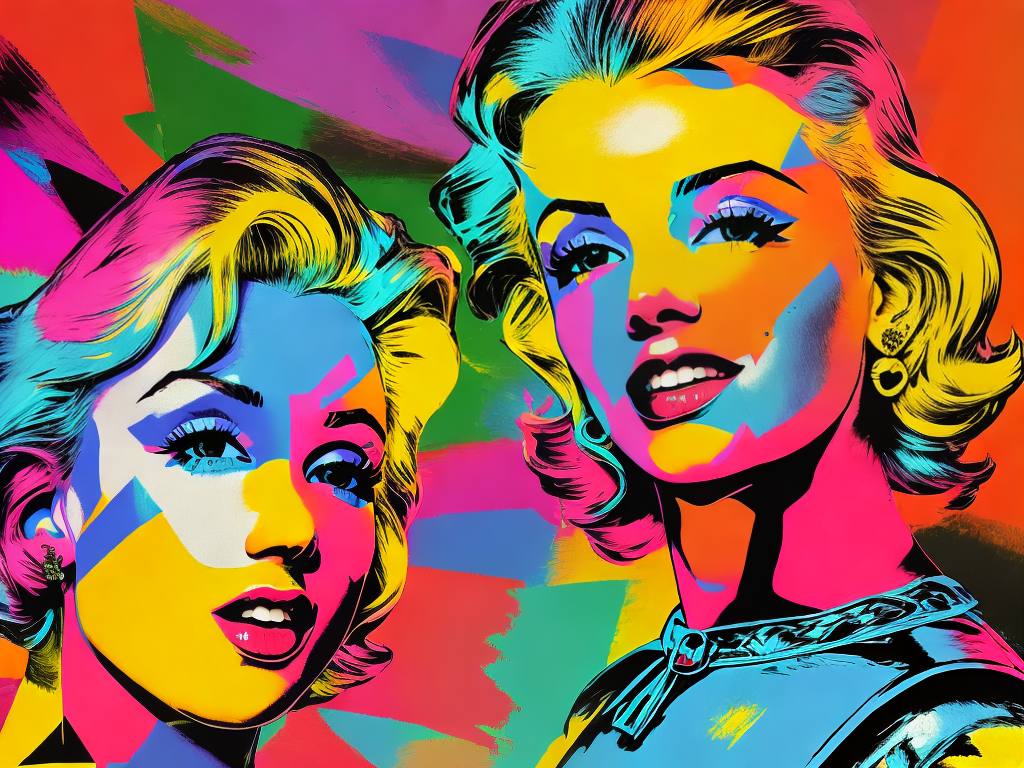


Are you a graphic artist looking for the latest and greatest way to create an eye-catching design? If so, then Pop Art is just what you need! This unique style of art has been around since the 1950s and continues to be as popular today as ever. With Photoshop, creating your own Pop Art masterpiece is easier than ever before. In this article, we’ll show you how to use Adobe’s powerful software to make stunning works of art that will amaze your friends and family. So let’s get started – it won’t take long until you’re producing beautiful pieces of original pop art!
What Is Pop Art?
Pop art is a visual art movement that emerged from the 1950s, characterized by its bright colors and bold lines. It’s all about making everyday objects look extraordinary, often times with an element of humor or irony. Pop art has been used to express political messages, as well as convey powerful portraits of people and places. In today’s world it has become increasingly popular in graphic design and digital media because of its vibrant aesthetic. It’s also very versatile; you can use pop art for logos, posters, videos, websites and more! No matter what your project looks like, incorporating this style will bring out a unique energy that’ll make it stand out from the rest. Ready to get started? Choosing a base image is the next step towards creating your own amazing pop art masterpiece.
Choosing A Base Image
Choosing a base image for your pop art effect is crucial to the end result. It should be appealing, vibrant, and colorful in order to make it stand out with the right effects applied later on. To ensure you have an optimal source of inspiration:
- Make sure that the colors are bright and well contrasted against each other.
- Take into consideration any potential design elements such as lines or patterns that could add more interest to the final product.
When selecting your photo, take some time to think about how you want the finished product to look like. Do you want it bold? Soft? Colorful? Or black and white? Knowing what kind of atmosphere you’re going for can help guide your decision in choosing a good base image. Furthermore, having a clear idea of what you’re trying to achieve will result in a higher-quality output once all adjustments are done.
Don’t forget there’s no one size fits all solution when creating something artistic! You can always tweak certain aspects along the way until you find something that resonates with you personally – so don’t hesitate to experiment with different photos before settling on one which works best for you. With this strong foundation set up, we can move onto adjusting color balance and further manipulations necessary for achieving our desired pop art effect!
Adjusting The Color Balance
Did you know that the pop art style has been around since the 1950s? It’s an iconic movement that still resonates with us today, and it’s never been easier to recreate its characteristic look in Photoshop. In this section, we’ll discuss how to adjust the color balance of your image for a classic pop art effect.
The first thing you should do is select an area of the image that’s easy on the eyes but still captures your attention—the focus point of your work. Once selected, use the ‘Curves’ adjustment layer tool to control brightness levels by raising or lowering individual points along the curve line. By doing so, you can begin to create some stark contrast between different areas of light and dark within your photo. Remember not to be too extreme; aim for subtlety and finesse!
Next up are saturation and hue values which will help bring out those vivid colors synonymous with pop art. To get started, pick a few specific elements from your picture—like hair color or fabric texture—and use their respective Hue/Saturation slider options in conjunction with each other until you achieve desirable results. A good rule of thumb here is to keep true-to-life hues while adding a slight boost in vibrancy every now and then to make sure everything stands out without being too outlandish.
It’s also important not to forget about background tones as they add depth and perspective when done right. Use a combination of selective adjustments like Brightness/Contrast or Levels combined with Color Balance to create interesting backdrops behind subjects in your work. Doing so can really drive home that pleasing retro vibe associated with vintage pop art visuals — making them all the more enjoyable for viewers! With these techniques at our disposal, let’s move onto adding vibrance and saturation…
Adding Vibrance And Saturation
Creating a Pop Art effect in Photoshop is an exciting and fun way to make your photos stand out. In this section, we will focus on adding vibrance and saturation to our images for a bolder look that really pops!
First off, select the layer you want to work with. Then, go to Image > Adjustments > Vibrance. Here, adjust the settings until you achieve the desired level of vibrancy in your photo. This may take some experimentation to get it just right – but don’t be afraid: feel free to play around until you find something that looks great!
Saturation is also essential for creating a vibrant pop art style image. To add more color depth, go back into Image > Adjustments > Saturation and increase the levels as desired. You can even choose specific colors from the dropdown menu if you want to customize further or emphasize certain tones in your picture.
Once you have set these adjustments correctly, save your document so that all changes are applied properly and viewable by other users who access it later on. Now we’re ready to move onto enhancing brightness and contrast – let’s get started!
Applying Brightness And Contrast
Now that you have added vibrancy and saturation to your image, it’s time to take it up a notch. Brightness and contrast adjustments can really create an eye-catching pop art effect in Photoshop.
Start by increasing the brightness until details in your photo become more visible. This will make colors look bolder and brighter. At the same time, be careful not to overdo it as this could wash out some of the finer details or cause too much glare on certain parts of the image. Then move onto adjusting the contrast. You want to increase the contrast just enough so that all elements within your photo stand out without appearing overly harsh or unnatural.
Once you are happy with how everything looks, consider adding additional effects such as blur and sharpening. Blurring is useful for softening edges around objects while sharpening adds clarity back into areas where necessary – like text or small intricate details in a picture. When done correctly, these effects can help add depth to an otherwise flat looking image making a vivid piece of Pop Art!
The results from applying brightness and contrast should already set a strong foundation for creating something unique but don’t stop there! Take advantage of blurring and sharpening tools available in Photoshop to further enhance each aspect of your work giving it even more impactful visual appeal!
Blurring And Sharpening
The first step to achieving a pop art effect in Photoshop is blurring and sharpening. To begin, select the layer that you’d like to work on. On the left side of your workspace, open up the filter menu located under the blur tab. Here, you can choose between different kinds of blur such as Gaussian or Motion Blur. Experimenting with these options will give you an idea of which type suits your image best.
Once you’ve found the right kind of filter for your project, adjust its intensity until it’s just how you want it. After that, move onto sharpening by opening another menu from underneath the Sharpen tab. This time there are two distinct options: Unsharp Mask and Smart Sharpen – both great for bringing out details within photographs and graphics alike. Adjust the settings according to preference and watch those edges come alive!
Now it’s time to get creative with color adjustments: desaturate your image if necessary or add vibrancy where appropriate; play around with levels to enhance contrast; sample colors from complementary layers; experiment with blending modes… The possibilities are endless but don’t forget to save often so as not to lose any progress along the way!
Taking all this into account, we’re now ready for our last few steps towards creating a retro look…
Creating A Retro Look
The blurring and sharpening techniques are an important part of creating a retro look. By introducing subtlety to your image, you can start to create a sense of nostalgia within the digital space. To take it further, there are some specific approaches that will help bring out the pop art effect in Photoshop. Here’s what you need to know:
- Start by deciding on the color palette and tone for your image. Once decided, adjust the contrast and saturation levels as needed to create striking visuals with just a few clicks.
- Next, use layering techniques to add depth and texture to your photo or artwork. You can also experiment with different brush strokes and filters to give the piece more character.
- Working with textures is key when trying to achieve this style – think about how light reflects off surfaces like paper or fabric; adding these elements into your design helps capture the essence of vintage images from days gone by.
- Finally, consider incorporating patterns into your work – such as halftones or polka dots – which were popular motifs during the Pop Art movement of the 1960s & 70s! With all these components combined together seamlessly, you’ll have created yourself a stunningly authentic-looking piece reminiscent of this iconic era!
To complete this retro aesthetic, now let’s move onto working with textures and patterns…
Working With Textures And Patterns
As the old saying goes, “A picture is worth a thousand words.” When it comes to creating pop art effects in Photoshop, this couldn’t be truer! To start off our journey into making memorable pieces of art with texture and patterns, let’s take a look at what we need:
| Texture | Pattern | Brush |
|---|---|---|
| ✔️ | ✔️ | ✔️ |
A good starting point for your project is finding textures and patterns that you like. You can find these online or create them yourself by scanning objects from nature such as leaves or rocks. After you have found some materials that inspire you, the next step is to incorporate those textures and patterns into your design. The easiest way to do this is by using layer masks and clipping masks. These tools will allow you to blend the colors together seamlessly and achieve an interesting effect on your artwork. Additionally, brushes are also key when it comes to adding detail and depth to your work – they can help give life to otherwise flat surfaces. Experimenting with different brush types and sizes will yield unique results every time!
With all of these components combined, you’ll be able to create stunning pop art effects in no time! From there, dive deeper into color theory if desired; playing around with contrasting shades or hues can make your piece even more eye-catching and impactful. Let creativity guide your hand as you explore various techniques…the possibilities are endless!
Now that we’ve discussed how textured backgrounds, pattern manipulation, and brush strokes come together to form beautiful artworks, let’s move onto mastering layer masks and clipping masks – two useful tools for blending elements within a composition.
Using Layer Masks And Clipping Masks
Now it’s time to start creating the pop art effect in Photoshop. To do this, we’ll be using layer masks and clipping masks. Layer masks are great for isolating certain parts of an image or artwork so that you can alter those areas separately from the rest. Clipping masks allow us to clip an image into a shape, such as a circle or square, which is essential for achieving the classic pop art look. Here’s how to get started:
- Create an adjustment layer with your desired color palette
- Use a brush tool to paint on a layer mask over the areas you want to adjust
- Create shapes by using vector paths and applying them as a clipping mask via the ‘Clipping Mask’ option
- Add different color gradients and levels of opacity within one area to create depth and texture
To really make your design stand out, you should consider adding borders and shapes around each element. This will add more definition and contrast between objects, making your overall composition more interesting! With just a few simple steps, you can give any photo or illustration more dimension and vibrancy – all without leaving Photoshop!
Adding Borders And Shapes
At first glance, creating a pop art effect in Photoshop may seem too intimidating to attempt. But with some thought and effort, it can be surprisingly easy! Ironically enough, the key to success is understanding that less really is more – keep your design simple and you will find yourself achieving great results.
Start by adding borders around your image – this will help set off the work of art from its surroundings. You can also add shapes or lines for further definition; these should contrast with whatever color scheme you are using so they stand out without distracting from the main image. As you experiment, take care not to overdo it as too many elements can make an artwork look cluttered rather than dynamic.
Next up: working with brushes and filters. Brushes provide a powerful way to bring life into a flat canvas while filters let you play with colors and tone. For maximum impact, use vibrant hues like those found in traditional comic books. If desired, you can even layer various effects together to create unique textures and shades – just remember to save your layers as you go along so nothing gets lost if something doesn’t turn out quite right!
As we move forward in our journey towards mastering pop art photography, don’t forget that practice makes perfect. The more time spent experimenting with different tools and techniques, the better equipped we’ll be when it comes time for us to show off our creations! Taking on challenges such as this one helps build skills and confidence – all part of being an innovator.
Working With Brushes And Filters
Creating a pop art effect in Photoshop is incredibly simple. Using brushes and filters, you can instantly create an eye-catching look that stands out from the rest. Here’s how to do it:
- Start by opening your image in Photoshop and creating a copy of the background layer.
- Then select one of Photoshop’s many brush tools and apply different colors to each area or object in your image. Try using bright hues for maximum impact!
- Once you’ve finished coloring all the areas, use some of Photoshop’s built-in filters to add depth and texture to your artwork. You can also experiment with distortion effects to make your pop art look more dynamic.
- With just a few clicks, you have successfully created a unique piece of art that will draw people in with its bold visuals and vibrant colors!
Now that we’ve got our base complete, let’s move on to the finishing touches.
Finishing Touches
Transitioning from the previous section like a well-orchestrated dance, it’s time to give your pop art effect some finishing touches. Just as an artist applies the last few strokes of paint to finish a painting, you can use Photoshop’s tools and filters to refine your masterpiece. Start by adjusting any colors or tones that aren’t quite right – make sure they are exactly how you want them so your work really pops! You can also use other creative effects such as blurs and distortions for added flair. Play around with different shapes, sizes and textures until you get just the look you’re going for. With all these elements in play, you’ll be sure to create something truly unique and eye-catching – an artwork that will stand out from the crowd. Now it’s time to turn your hard work into something tangible that others can enjoy.
Exporting Your Artwork
Creating a pop art effect in Photoshop is an exciting way to take your artwork to the next level. With just a few simple steps, you can transform any image into a vibrant and colorful piece of digital art. First off, you’ll need to open your photo in Photoshop and duplicate the layer. Then adjust the levels or curves to get the colors that you want for your project. Once everything looks good, it’s time to start adding elements like halftones and textured backgrounds to really make the design stand out.
Next up is outlining! This step helps define details in your work as well as creates shapes that are iconic within Pop Art itself. All you have to do is use the pen tool or lasso selection tools and then apply different effects depending on what look you’re going for with your project. Finally, don’t forget about exporting! You should always save out multiple copies of your work so that you have extra backups if something goes wrong later down the line. Make sure each copy includes all layers, blending modes, effects and adjustments that were used during production- this will help ensure that no detail gets lost when transferring from Photoshop to whatever medium you’d like to print onto.
Exporting correctly ensures high quality images every single time which can be printed at larger sizes without losing clarity or color accuracy – perfect for creating large scale prints of your artwork! It also allows people who may not have access to Adobe products view and admire your creations online too – no matter where they are located around the globe! So whether presenting online or printing out copies of your masterpiece, taking care while saving out files gives everyone access to appreciate the beauty of Pop Art created using Photoshop!
Now go forth and share those stunning pieces with anyone looking for some visual inspiration!
Conclusion
Pop art is a great way to add interest and drama to any photo. It’s easy to create by adjusting the color balance, adding vibrance and saturation, applying brightness and contrast, and working with brushes and filters. Juxtaposing different elements can help you achieve the desired effect in your artwork. With these simple steps I’ve outlined, you’ll be able to transform any image into an eye-catching work of pop art!


